
DPI রূপান্তর সহজ করা: আপনার যা জানা দরকার সবকিছু
সূচিপত্র
DPI রূপান্তর কী?
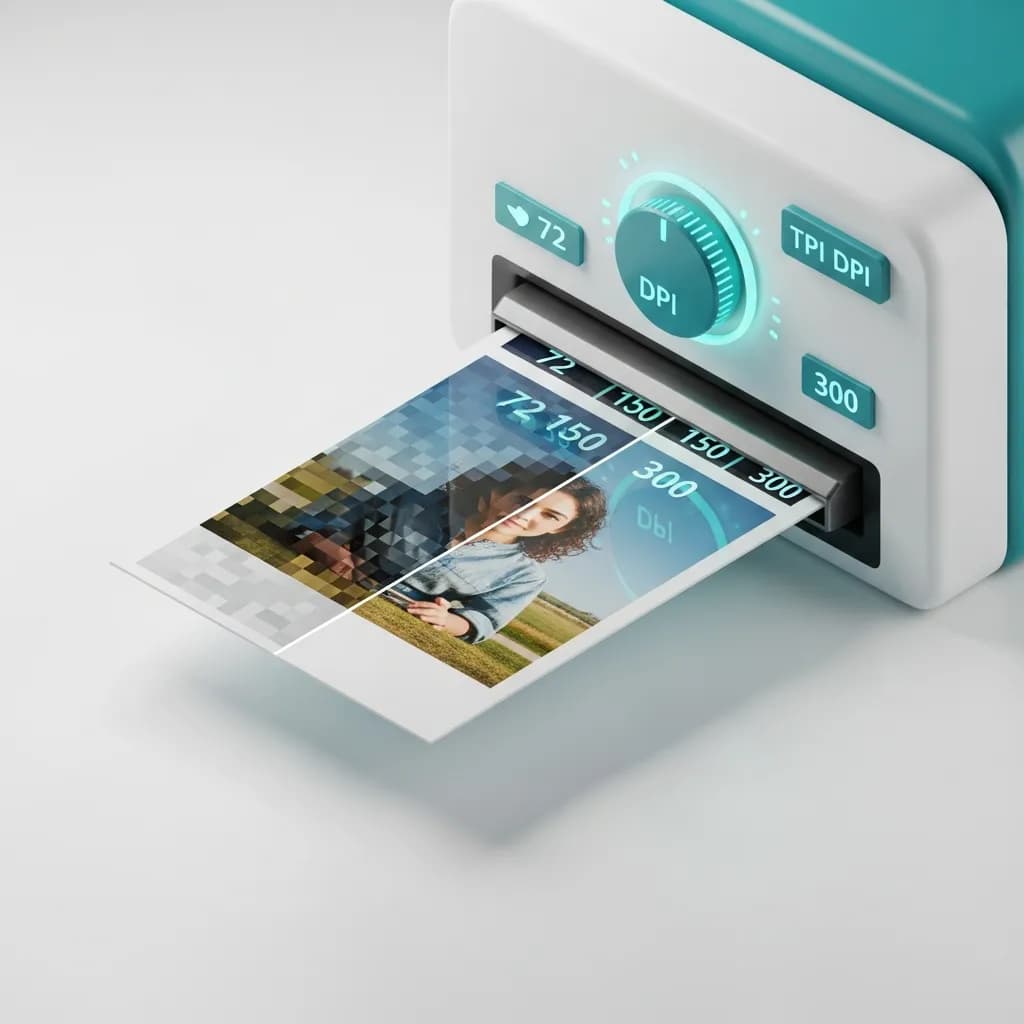
DPI মানে ডটস পার ইঞ্চ — এটি পরিমাপ করে যে একটি প্রিন্টার কাগজের এক ইঞ্চের মধ্যে কতগুলো কালির বিন্দু রাখে। যখন আপনি একটি ইমেজের DPI রূপান্তর করেন, আপনি সেই নির্দেশনা পরিবর্তন করছেন যা প্রিন্টারকে বলে সেই ইমেজটি কত বড় বা ছোট করে প্রিন্ট করতে হবে। DPI যত বেশি, প্রিন্টের প্রতি ইঞ্চিতে তত বেশি বিস্তারিত তথ্য থাকবে।
এখানেই বেশিরভাগ মানুষ বিভ্রান্ত হন: শুধুমাত্র DPI মান পরিবর্তন করলে আপনার ইমেজে কোনো নতুন বিস্তারিত তথ্য যোগ হয় না। যদি আপনার কাছে 250 DPI-তে 1000 × 1000 পিক্সেলের একটি ইমেজ থাকে, তাহলে আপনার প্রিন্টার 4 × 4 ইঞ্চের একটি প্রিন্ট তৈরি করবে। এটি 100 DPI-তে পরিবর্তন করুন, এবং একই পিক্সেলগুলো এখন 10 × 10 ইঞ্চ প্রিন্টে ছড়িয়ে যাবে — কিন্তু প্রকৃত পিক্সেল সংখ্যা 1000 × 1000 থাকবে। ইমেজটি জাদুর মতো তীক্ষ্ণ হয়ে যায় না।
DPI বনাম PPI: পার্থক্য কী?
আপনি প্রায়ই DPI এবং PPI (পিক্সেল পার ইঞ্চ) একে অপরের বদলে ব্যবহার হতে দেখবেন, কিন্তু এগুলো একই জিনিস নয়। DPI প্রিন্ট আউটপুট বোঝায় — কাগজে কালির ভৌত বিন্দু। PPI ডিজিটাল ডিসপ্লে বোঝায় — আপনার স্ক্রিনে দেখানো পিক্সেলের সংখ্যা। প্রিন্টের জন্য ইমেজ প্রস্তুত করার সময়, DPI-ই গুরুত্বপূর্ণ। ওয়েব এবং স্ক্রিন ব্যবহারের জন্য, পিক্সেল ডাইমেনশন এবং PPI-ই মূল বিষয়।
DPI-র পেছনে সহজ গণিত
দুটি সূত্র প্রায় প্রতিটি পরিস্থিতি কভার করে যার মুখোমুখি আপনি হবেন:
- প্রিন্ট সাইজ = পিক্সেল ডাইমেনশন ÷ DPI
- প্রয়োজনীয় পিক্সেল = প্রিন্ট সাইজ × DPI
উদাহরণস্বরূপ, যদি আপনার 300 DPI-তে 5 × 7 ইঞ্চ প্রিন্ট দরকার হয়, তাহলে আপনার কমপক্ষে 1500 × 2100 পিক্সেলের সোর্স ইমেজ প্রয়োজন হবে।
প্রিন্ট এবং ডিজিটালের জন্য DPI কেন গুরুত্বপূর্ণ
প্রিন্ট: 300 DPI সোনালী মান
প্রিন্টিং শিল্প 300 DPI-কে পেশাদার মানের মানদণ্ড হিসেবে গ্রহণ করেছে। এই রেজোলিউশনে, কালির বিন্দু এতটাই ঘনভাবে স্থাপিত হয় যে মানুষের চোখ স্বাভাবিক পড়ার দূরত্বে মসৃণ, তীক্ষ্ণ ইমেজ দেখতে পায়। ব্যবসায়িক কার্ড, ব্রোশিউর, বইয়ের কভার এবং ফটোগ্রাফ — সবকিছু 300 DPI বা তার বেশিতে সেরা দেখায়।
বিশেষ ক্ষেত্রে, আপনার আরও বেশি রেজোলিউশন প্রয়োজন হতে পারে:
- ম্যাগাজিন এবং গ্যালারি প্রিন্ট: চমৎকার বিস্তারিত তথ্যের জন্য 600 DPI বা তার বেশি
- টেক্সট-প্রধান ডকুমেন্ট: সূক্ষ্ম টাইপের পাঠযোগ্যতা বজায় রাখতে 400 DPI
- দৈনন্দিন অফিস প্রিন্টিং: 150–300 DPI সাধারণত যথেষ্ট
ওয়েব: পিক্সেলই মূল, DPI নয়
ডিজিটাল স্ক্রিনে, DPI মেটাডেটা মূলত অর্থহীন। একই পিক্সেল ডাইমেনশনের একটি 72 DPI ইমেজ এবং একটি 7000 DPI ইমেজ আপনার মনিটরে হুবহু একই রকম দেখাবে। ওয়েব ইমেজ সাধারণত 72–96 DPI ব্যবহার করে কারণ ছোট মেটাডেটা মানে সামান্য ছোট ফাইল সাইজ — যা দ্রুত পেজ লোডিং-এ রূপান্তরিত হয়।
মূল কথা: স্ক্রিনে প্রদর্শিত যেকোনো কিছুর জন্য, পিক্সেল ডাইমেনশন এবং ফাইল সাইজে মনোযোগ দিন, DPI-তে নয়। প্রিন্টের জন্য, DPI-ই সবকিছু।
দেখার দূরত্ব কীভাবে নিয়ম পরিবর্তন করে
কেউ আপনার প্রিন্ট থেকে যত দূরে দাঁড়াবে, আপনার প্রকৃতপক্ষে তত কম DPI প্রয়োজন। মানুষের চোখ দূর থেকে সূক্ষ্ম বিস্তারিত তথ্য চিহ্নিত করতে পারে না। এই কারণেই একটি বিলবোর্ড 15 DPI-তে পুরোপুরি তীক্ষ্ণ দেখায় যখন একটি ব্যবসায়িক কার্ডের 300 প্রয়োজন।
| দেখার দূরত্ব | প্রস্তাবিত DPI | সাধারণ ব্যবহার |
|---|---|---|
| বাহুর দৈর্ঘ্য (~1.5 ft) | 300 DPI | ব্যবসায়িক কার্ড, ফটো, ব্রোশিউর |
| 3–5 feet | 150–200 DPI | পোস্টার, ফ্রেমড প্রিন্ট |
| 5–10 feet | 60–120 DPI | ট্রেড শো ডিসপ্লে, ব্যানার |
| 10+ feet | 30–60 DPI | বড় ব্যানার, ওয়াল ম্যুরাল |
| 33+ feet | 15–20 DPI | বিলবোর্ড, বিল্ডিং র্যাপ |
দ্রুত DPI মান রেফারেন্স
| DPI পরিসীমা | মানের স্তর | সেরা ব্যবহার |
|---|---|---|
| 150 DPI-র কম | নিম্ন | ড্রাফট, অভ্যন্তরীণ প্রুফ, শুধু-ওয়েব ইমেজ |
| 150–299 DPI | মাঝারি | নিউজলেটার, বেসিক ফ্লায়ার, দৈনন্দিন প্রিন্টিং |
| 300 DPI | উচ্চ (মানক) | পেশাদার প্রিন্ট: ব্রোশিউর, ফটো, কার্ড |
| 400–600+ DPI | প্রিমিয়াম | ফাইন আর্ট, ম্যাগাজিন, টেক্সট-প্রধান ডকুমেন্ট |
কীভাবে DPI রূপান্তর করবেন (৩টি পদ্ধতি)
পদ্ধতি ১: PandaToolz DPI Converter ব্যবহার করুন (বিনামূল্যে — সাইনআপ নেই)
আপনার ইমেজের DPI পরিবর্তন করার সবচেয়ে দ্রুত উপায় হলো PandaToolz-এর বিনামূল্যে DPI Converter। এটি সম্পূর্ণরূপে আপনার ব্রাউজারে চলে, কোনো অ্যাকাউন্টের প্রয়োজন নেই, এবং সেকেন্ডের মধ্যে রূপান্তর সম্পন্ন করে:
- Change DPI টুল খুলুন
- আপনার ইমেজ আপলোড করুন (JPG, PNG, TIFF, BMP, এবং আরও অনেক ফরম্যাট সাপোর্ট করে)
- আপনার লক্ষ্য DPI মান লিখুন (যেমন, প্রিন্টের জন্য 300, ওয়েবের জন্য 72)
- Convert-এ ক্লিক করুন এবং আপডেট করা ইমেজ ডাউনলোড করুন
পদ্ধতি ২: Adobe Photoshop ব্যবহার করুন (প্রো সফটওয়্যার)
যদি আপনি ইতিমধ্যে Adobe Photoshop-এ কাজ করছেন, এটি সুনির্দিষ্ট DPI নিয়ন্ত্রণ প্রদান করে:
Adobe Photoshop ব্যবহার করে দেখুন — ইমেজ এডিটিং-এর শিল্প মানদণ্ড- আপনার ইমেজ Photoshop-এ খুলুন (File > Open)
- Image > Image Size-এ যান
- Document Size সেকশনে Resolution ফিল্ড খুঁজুন
- আপনার লক্ষ্য DPI লিখুন (প্রিন্টের জন্য 300 মানক)
- গুরুত্বপূর্ণ: আপনি যদি পিক্সেল ডাইমেনশন অপরিবর্তিত রাখতে চান, তাহলে সমন্বয় করার আগে "Resample" আনচেক করুন। এটি শুধুমাত্র প্রিন্ট নির্দেশনা পরিবর্তন করে, প্রকৃত পিক্সেল ডেটা নয়।
- OK-তে ক্লিক করুন এবং সেভ করুন
Photoshop সবচেয়ে শক্তিশালী বিকল্প যখন আপনাকে DPI পরিবর্তনের পাশাপাশি রিটাচিং, কালার কারেকশন, বা অন্যান্য উন্নত এডিট করতে হয়।
পদ্ধতি ৩: অন্যান্য অনলাইন DPI টুল
PandaToolz ছাড়াও যদি আপনার বিকল্প প্রয়োজন হয়, বেশ কিছু অন্যান্য বিনামূল্যে অনলাইন টুল বেসিক DPI রূপান্তর করতে পারে:
- Clideo DPI Converter — আপনার ডিভাইস বা ক্লাউড স্টোরেজ (Google Drive, Dropbox) থেকে আপলোড করুন, প্রিসেট DPI (600, 300, 200, 150, 100, 72) নির্বাচন করুন বা কাস্টম মান লিখুন, এবং ডাউনলোড করুন। দ্রষ্টব্য: ফাইলগুলো 24 ঘণ্টা পর স্বয়ংক্রিয়ভাবে মুছে যায়। Clideo দেখুন
- Convert Town — একটি সরল, তিন-ধাপের কনভার্টার। DPI নির্বাচন করুন, আপলোড করুন, ডাউনলোড করুন। একসাথে একাধিক ফাইল হ্যান্ডেল করার জন্য ব্যাচ কনভার্শনসহ ডেস্কটপ ভার্সনও আছে। Convert Town দেখুন
- DPI Converter (convert-dpi.com) — দুটি রূপান্তর পদ্ধতি প্রদান করে: শুধুমাত্র মেটাডেটা পরিবর্তন অথবা সম্পূর্ণ ইমেজ রিস্যাম্পলিং। যেসব ফরম্যাট স্বাভাবিকভাবে DPI মেটাডেটা সংরক্ষণ করে না, সেগুলোর সাথেও কাজ করে। DPI Converter দেখুন
২০২৬-এর সেরা ৫টি বিনামূল্যে DPI কনভার্টার
ব্যবহারযোগ্যতা, বৈশিষ্ট্য এবং নির্ভরযোগ্যতার ভিত্তিতে র্যাংক করা সেরা বিনামূল্যে DPI কনভার্টারগুলোর তালিকা।
| র্যাংক | টুল | সেরা ব্যবহার | ফরম্যাট | মূল্য |
|---|---|---|---|---|
| #1 | PandaToolz | দ্রুত, ব্যক্তিগত, সাইনআপ-ছাড়া রূপান্তর | JPG, PNG, TIFF, BMP+ | বিনামূল্যে |
| #2 | Adobe Photoshop | উন্নত এডিটিং + DPI নিয়ন্ত্রণ | সব প্রধান ফরম্যাট | From $22.99/mo |
| #3 | Clideo | ক্লাউড স্টোরেজ ইন্টিগ্রেশন | JPEG, PNG, TIFF, BMP, PPM | বিনামূল্যে (সীমিত) |
| #4 | Convert Town | ব্যাচ কনভার্শন (ডেস্কটপ) | JPG, PNG, TIF, BMP, ICO | বিনামূল্যে |
| #5 | DPI Converter | মেটাডেটা বনাম রিস্যাম্পল পছন্দ | JPG, PNG, TIF, BMP, ICO | বিনামূল্যে |
১. PandaToolz DPI Converter (সম্পাদকের পছন্দ)
PandaToolz-এর Change DPI টুল আমাদের তালিকায় শীর্ষে কারণ এটি মৌলিক বিষয়গুলো নিখুঁতভাবে করে: এটি দ্রুত, বিনামূল্যে, ব্যক্তিগত, এবং কোনো সাইনআপ প্রয়োজন নেই। আপনার ইমেজ আপলোড করুন, আপনার লক্ষ্য DPI সেট করুন, এবং হয়ে গেল। যেহেতু রূপান্তর সম্পূর্ণরূপে আপনার ব্রাউজারে চলে, আপনার ফাইল কখনো আপনার ডিভাইস ছেড়ে যায় না।
DPI রূপান্তরের পাশাপাশি, PandaToolz রিসাইজিং, কম্প্রেশন, ফরম্যাট কনভার্শন এবং আরও অনেক কিছুসহ বিনামূল্যে ইমেজ টুলের সম্পূর্ণ সংগ্রহ প্রদান করে — যা এটিকে ইমেজ অপটিমাইজেশনের জন্য একটি সম্পূর্ণ সমাধান করে তোলে।
২. Adobe Photoshop
Adobe Photoshop একটি কারণেই শিল্প মানদণ্ড। এটি সম্পূর্ণ পেশাদার এডিটিং স্যুটের সাথে সবচেয়ে সুনির্দিষ্ট DPI নিয়ন্ত্রণ প্রদান করে। আপনি যদি ইতিমধ্যে Adobe ইকোসিস্টেমে থাকেন, এটি স্বাভাবিক পছন্দ। শেখার বক্ররেখা বেশি, তবে শক্তি অতুলনীয়।
Photoshop Adobe-এর Photography প্ল্যানের অংশ হিসেবে $22.99/month থেকে শুরু হয়, যার মধ্যে Lightroom-ও অন্তর্ভুক্ত।
৩. Clideo
Clideo এর নিরবচ্ছিন্ন ক্লাউড স্টোরেজ ইন্টিগ্রেশনের জন্য আলাদা। আপনি সরাসরি Google Drive বা Dropbox থেকে আপলোড করতে পারেন, প্রিসেট DPI মান নির্বাচন করুন, এবং ডাউনলোড করুন। এটি JPEG, PNG, TIFF, BMP, এবং PPM ফরম্যাট সাপোর্ট করে। অসুবিধা: আপনার ফাইলগুলো তাদের সার্ভারে প্রক্রিয়া করা হয় (24 ঘণ্টা পর স্বয়ংক্রিয়ভাবে মুছে যায়)।
৪. Convert Town
Convert Town যতটা সহজ হতে পারে: DPI নির্বাচন করুন, আপলোড করুন, ডাউনলোড করুন। এটিকে যা আলাদা করে তা হলো এর ডেস্কটপ ভার্সন যা ব্যাচ কনভার্শন এবং রাইট-ক্লিক ফাংশনালিটি যোগ করে — আপনি যদি নিয়মিত একাধিক ফাইল রূপান্তর করেন তাহলে এটি আদর্শ। ওয়েব ভার্সন JPG, PNG, TIF, BMP, এবং ICO হ্যান্ডেল করে।
৫. DPI Converter (convert-dpi.com)
DPI Converter আপনাকে এমন একটি পছন্দ দেয় যা অন্য বেশিরভাগ দেয় না: শুধুমাত্র মেটাডেটা পরিবর্তন বনাম সম্পূর্ণ রিস্যাম্পলিং। আপনি যদি পিক্সেল পরিবর্তন না করে শুধু DPI ট্যাগ আপডেট করতে চান, এটি করতে পারে। আপনি যদি নতুন ডাইমেনশনে ইমেজ রিস্যাম্পল করতে চান, সেটাও করতে পারে। এমন বিশেষ ক্ষেত্রে উপযোগী যেখানে অন্য টুলগুলো কম পড়ে যায়।
ভালো DPI রূপান্তরের জন্য প্রো টিপস
-
উচ্চ-রেজোলিউশন সোর্স ইমেজ দিয়ে শুরু করুন। এটি সবচেয়ে গুরুত্বপূর্ণ নিয়ম। কম-রেজোলিউশন ইমেজকে 300 DPI-তে আপস্যাম্পল করলে বিস্তারিত তথ্য যোগ হবে না — সফটওয়্যার কেবল বিদ্যমান পিক্সেল প্রসারিত করে, যার ফলে আপনি নরম, পিক্সেলেটেড প্রিন্ট পাবেন। সর্বদা সর্বোচ্চ সম্ভব রেজোলিউশনে শুট বা স্ক্যান করুন।
-
DPI আপনার আউটপুটের সাথে মেলান। অন্ধভাবে সবকিছু 300 DPI-তে সেট করবেন না। আপনি যদি একটি ব্যানার তৈরি করছেন যা 10 feet দূর থেকে দেখা হবে, 60–120 DPI যথেষ্ট। বড়-ফরম্যাটের প্রিন্টে অতিরিক্ত উচ্চ DPI প্রক্রিয়াকরণ সময় নষ্ট করে এবং অপ্রয়োজনীয়ভাবে বড় ফাইল তৈরি করে।
-
শুধু DPI নয়, পিক্সেল ডাইমেনশনও যাচাই করুন। একটি 300 DPI ইমেজ যা মাত্র 300 × 300 পিক্সেল, সেটি মাত্র 1 × 1 ইঞ্চে প্রিন্ট হবে। সূত্র ব্যবহার করুন: পিক্সেল ÷ DPI = ইঞ্চে প্রিন্ট সাইজ।
-
কাজের জন্য সঠিক টুল ব্যবহার করুন। দ্রুত একটি রূপান্তরের জন্য, PandaToolz সেকেন্ডে কাজ সম্পন্ন করে। ব্যাচ প্রক্রিয়াকরণ বা উন্নত এডিটের জন্য, Photoshop বা ডেস্কটপ টুল বেশি যুক্তিসঙ্গত।
-
ফাইল ফরম্যাট বিবেচনা করুন। TIFF প্রিন্ট ওয়ার্কফ্লোর জন্য সর্বোচ্চ মান সংরক্ষণ করে। JPEG কম্প্রেশন আর্টিফ্যাক্ট তৈরি করে। PNG ললেস কিন্তু বড় ফাইল তৈরি করতে পারে। মান বা ফাইল সাইজ — কোনটি বেশি গুরুত্বপূর্ণ তার ভিত্তিতে আপনার ফরম্যাট বেছে নিন।
মূল বিষয়সমূহ
-
প্রিন্টের জন্য পেশাদার মানে 300 DPI প্রয়োজন। ওয়েব ইমেজের জন্য দ্রুত লোডিং এবং পরিষ্কার স্ক্রিন ডিসপ্লের জন্য শুধু 72–96 DPI প্রয়োজন।
-
DPI প্রিন্ট নির্দেশনা পরিবর্তন করে, ইমেজ মান নয়। কম-রেজোলিউশন ইমেজকে উচ্চ DPI-তে রূপান্তর করলে অনুপস্থিত বিস্তারিত তথ্য বা পিক্সেল যোগ হবে না।
-
দেখার দূরত্ব আপনার DPI লক্ষ্য নির্ধারণ করে। কাছ থেকে দেখা উপকরণের 300 DPI প্রয়োজন; ব্যানার এবং বিলবোর্ড 15–150 DPI-তে চলতে পারে।
-
বিনামূল্যে টুলগুলো DPI রূপান্তর সহজ করে দেয়। PandaToolz-এর DPI converter কোনো সাইনআপ, সার্ভারে আপলোড, বা খরচ ছাড়াই সেকেন্ডে কাজ সম্পন্ন করে।
-
সর্বদা সেরা সোর্স ইমেজ দিয়ে শুরু করুন যা আপনি পেতে পারেন। উচ্চ-রেজোলিউশন মূল ফাইলগুলো আপনাকে মান ত্যাগ না করেই যেকোনো আকারে প্রিন্ট করার নমনীয়তা দেয়।
প্রায়শই জিজ্ঞাসিত প্রশ্নাবলী
300 DPI এবং 72 DPI-র মধ্যে পার্থক্য কী?
300 DPI উচ্চ-মানের প্রিন্ট উপকরণের মানদণ্ড — ব্যবসায়িক কার্ড, ফটো, ব্রোশিউর। 72 DPI সাধারণত স্ক্রিনে প্রদর্শিত ইমেজের জন্য ব্যবহৃত হয়। DPI মান প্রিন্টারকে বলে কালির বিন্দু কত ঘনভাবে স্থাপন করতে হবে। ডিজিটাল স্ক্রিনে, DPI মেটাডেটা ইমেজ কেমন দেখায় তা প্রভাবিত করে না; শুধুমাত্র পিক্সেল ডাইমেনশনই গুরুত্বপূর্ণ।
আমি কীভাবে একটি ইমেজ 72 DPI থেকে 300 DPI-তে রূপান্তর করব?
সবচেয়ে দ্রুত উপায় হলো PandaToolz-এর DPI Converter-এর মতো একটি বিনামূল্যে অনলাইন টুল ব্যবহার করা। শুধু আপনার ইমেজ আপলোড করুন, লক্ষ্য DPI হিসেবে 300 লিখুন, এবং ডাউনলোড করুন। আপনি Photoshop-ও (Image > Image Size > Resolution) ব্যবহার করতে পারেন। মনে রাখবেন যে শুধু DPI বাড়ালে কম-রেজোলিউশন ইমেজে নতুন বিস্তারিত তথ্য যোগ হবে না।
DPI পরিবর্তন কি ইমেজ মান প্রভাবিত করে?
সরাসরি না। DPI পরিবর্তন ফাইলে এম্বেড করা প্রিন্ট নির্দেশনা পরিবর্তন করে — এটি প্রিন্টারকে বলে প্রতি ইঞ্চিতে কত বিন্দু ব্যবহার করতে হবে। প্রকৃত পিক্সেল ডেটা অপরিবর্তিত থাকে। প্রিন্ট মান সত্যিকারভাবে উন্নত করতে, আপনাকে উচ্চ-রেজোলিউশন সোর্স ইমেজ দিয়ে শুরু করতে হবে।
ওয়েব ইমেজের জন্য আমার কোন DPI ব্যবহার করা উচিত?
ওয়েব ব্যবহারের জন্য 72–96 DPI মানক, যদিও DPI মান নিজে স্ক্রিনের জন্য খুব বেশি গুরুত্বপূর্ণ নয়। অনলাইনে একটি ইমেজ কেমন দেখায় তা আসলে তার পিক্সেল ডাইমেনশন এবং ফাইল সাইজ দ্বারা নির্ধারিত হয়। কম DPI মেটাডেটা দ্রুত পেজ লোডের জন্য ফাইল সাইজ সামান্য ছোট রাখতে সাহায্য করে।
দেখার দূরত্ব কীভাবে DPI প্রয়োজনীয়তা প্রভাবিত করে?
কেউ প্রিন্ট থেকে যত দূরে দাঁড়াবে, DPI তত কম হতে পারে। বাহুর দৈর্ঘ্যে, ইমেজ তীক্ষ্ণ দেখাতে 300 DPI প্রয়োজন। 10 feet-এ, 60 DPI যথেষ্ট। 33+ feet (বিলবোর্ড)-এ, এমনকি 15–20 DPI-ও কাজ করে কারণ সেই দূরত্ব থেকে চোখ পৃথক বিন্দু চিহ্নিত করতে পারে না।
আমি কি আমার ফোনে DPI রূপান্তর করতে পারি?
হ্যাঁ। ব্রাউজার-ভিত্তিক টুল যেমন PandaToolz ব্রাউজার আছে এমন যেকোনো ডিভাইসে কাজ করে, ফোন এবং ট্যাবলেটসহ। কোনো অ্যাপ ডাউনলোডের প্রয়োজন নেই।